Forgot Password
Enter your email address and we will send you a link to reset your password.For security sign in links are valid for 30 minutes.
Your cart is empty
Color
Size
Width
If you have any questions, feel free to contact us with support@triboots.com
Men's Conversion Size (TRI.sneakers.EUR.UK)
| TRI BOOTS | Size | |||||||||||||||||
| Men | US | 6 | 6.5 | 7 | 7.5 | 8 | 8.5 | 9 | 9.5 | 10 | 10.5 | 11 | 11.5 | 12 | 12.5 | 13 | 14 | 15 |
| EUR | 38.5 | 39 | 40 | 40.5 | 41 | 42 | 42.5 | 43 | 44 | 44.5 | 45 | 45.5 | 46 | 47 | 48 | 49 | 49 | |
| UK | 5.5 | 6 | 6.5 | 7 | 7.5 | 8 | 8.5 | 9 | 9.5 | 10 | 10.5 | 11 | 11.5 | 12 | 12.5 | 13 | 14 | |
| Foot Length | mm | 240 | 245 | 250 | 253 | 255 | 260 | 263 | 265 | 270 | 273 | 275 | 278 | 280 | 285 | 290 | 295 | 300 |
Size Guide
1:
Tools Needed
A sheet of paper large enough to fit your entire foot
A non-slip pen or marker (ballpoint, gel pen, etc.)
A ruler or straight edge, accurate to the millimeter
Best Time to Measure
Measure in the late afternoon or early evening, when your feet have swelled slightly from daily activity and reflect your true, at-wear-time size.
Step-by-Step Instructions
Lay the paper flat on a hard, level surface and place one heel firmly against a wall or straight edge.
Stand naturally, shifting your weight slightly onto the foot you’re measuring.
With the pen held perpendicular to the paper, mark the paper at the very back of your heel and again at the tip of your longest toe (usually the big toe or second toe).
Lift your foot, then use the ruler to measure the straight-line distance between the two marks, to the nearest millimeter.
Compare Both Feet
Since left and right feet can differ, measure both and use the longer length when selecting shoes.
Converting to Shoe Size
Once you have your foot length in millimeters, consult the appropriate size chart (EU, UK, US, etc.) or your brand’s own conversion table to choose the correct shoe size.
2: You can opt for the same size as your regular leather boots or dress shoes.
3: If you still have any doubts about sizing, feel free to use our online chat or email. Our customer service team will be available to answer any questions you may have.
How to Clean Leather Boots: A Step-by-Step Guide
Leather boots are not just a fashion statement; they are an investment. To keep them looking their best and ensure their longevity, regular cleaning and maintenance are crucial. Cleaning leather boots may seem like a daunting task, but with the right techniques and products, it can be a relatively simple process. Here's a step-by-step guide to help you clean your leather boots effectively:
Step 1: Gather Your Supplies
Before starting the cleaning process, gather the necessary supplies. You will need a soft cloth or sponge, mild soap or leather cleaner, warm water, a soft-bristled brush, leather conditioner, and a clean towel.
Step 2: Remove Loose Dirt and Dust
Using a soft cloth or brush, gently remove any loose dirt and dust from the surface of your leather boots. Pay attention to the seams and crevices where dirt tends to accumulate.
Step 3: Prepare the Cleaning Solution
In a small bowl, mix a few drops of mild soap or leather cleaner with warm water. Be cautious not to use too much soap as it can damage the leather. Stir the mixture gently until it becomes slightly foamy.
Step 4: Wipe Down the Boots
Dampen a soft cloth or sponge in the cleaning solution, ensuring it is not soaked. Gently wipe down the entire surface of the boots, including the uppers, soles, and heels. Be thorough but gentle to avoid scratching or discoloring the leather.
Step 5: Focus on Stubborn Stains
For stubborn stains that don't come off easily, dip the soft cloth or sponge in the cleaning solution and apply it directly to the affected area. Gently rub in a circular motion until the stain starts to lift. Patience is key here - avoid vigorous scrubbing, as it can damage the leather.
Step 6: Rinse and Dry
Once you've cleaned your boots, rinse the cloth or sponge with clean water and wipe away any soap residue. Then, using a damp cloth, wipe down the boots to remove the cleaning solution. Make sure to wring out the cloth well to avoid over-wetting the leather. Finally, use a dry towel to pat the boots dry, removing any excess moisture.
Step 7: Condition the Leather
After the boots are completely dry, apply a small amount of leather conditioner to a soft cloth. Gently rub the conditioner onto the surface of the boots, focusing on areas that tend to dry out, such as the toe cap and heel. Conditioning helps moisturize and nourish the leather, keeping it supple and preventing cracking.
Step 8: Allow Time to Dry
Allow your boots to air dry in a cool, well-ventilated area. Avoid exposing them to direct heat sources like radiators or sunlight, as it can cause the leather to warp or crack.
Following these steps regularly will help maintain the quality and appearance of your leather boots. Remember, prevention is key - treat any spills or stains promptly, and protect your boots with a water-repellent spray. With proper care, your leather boots will continue to look stylish and serve you well for years to come.
Standard shipping is free anywhere within the contiguous United States. Please note that we do not ship to P.O. boxes.
In-stock orders typically have a 1-3 business day processing time at our warehouse before they ship, but may take longer during the holidays due to high order volumes. As soon as your order ships, you will receive a tracking number and within 24 hours you will be able to see the estimated delivery date. Orders placed within the US typically take 10-15 business days to be delivered once shipped.
Most of our products are custom-made, resulting in relatively low inventory levels, we regularly replenish our stock approximately every 15 days.
Expedited shipping is available if you need your order in a hurry. You can upgrade your shipping method at checkout for an additional fee. Currently, this option is only available to customers in the contiguous United States. (Note: Expedited orders placed after 2pm ET will process the next business day. Orders do not ship on Saturday, Sunday, or United States holidays.)
We reserve the right to refuse free shipping for any customer returns.
If you need your order even faster or have any special circumstances, please send us an email and we'll see what we can do. Mail:support@triboots.com
For pre-orders/backorders, please refer to the shipping date on the product page.
We accept return or exchange applications within 30 days. If you have any questions, please contact us via email: support@triboots.com.


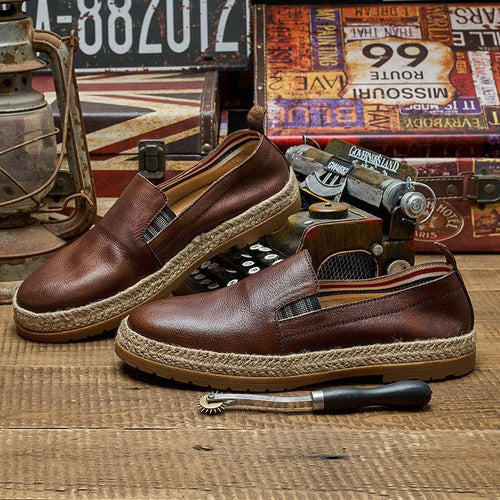
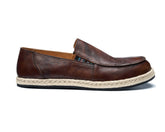
With the variety of color options and exquisite and fashionable design, these casual shoes can make you stand out from the crowd.
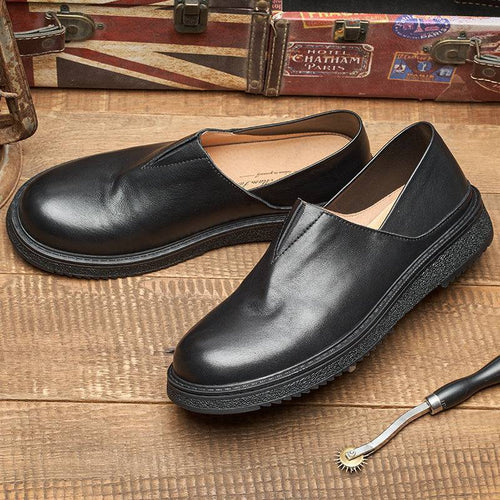
The cushioning of the sole offers the shoes great comfort. And with the breathable materials and special technique, these shoes are lightweight and breathable. Thus they are comfortable to wear all day.
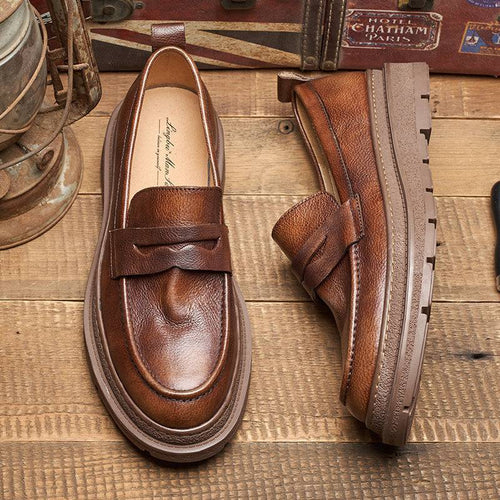
These casual shoes are designed with durable materials and reinforced stitching. With the advanced manufacturing techniques, they are resilient to wear and tear, allowing for long-lasting performance and style.